Controlling access to services in Kubernetes is not as straight forward as you would think. While the use case is common it is regularly deemed an enterprise features and implemented behind paid plugins and closed source development. This post will give a brief overview of Authorization, provide some resources to evaluate Ingress Controllers, document some of the things I’ve learned evaluating a few of them, and finally show how a surprise contender Apisix became my pick of the lot.
Authn vs Authz
Authorizing a user is typically broken down into to steps abbreviated as Authn and Authz. These are shorthand for Authentication (authn) and Authorization (authz). When the abbreviation ‘auth’ is used by itself it’s unclear what the intention is but in my experience it tends to map to ‘authn’ only.
Authentication (authn) is the process of verifying an identify for a user. This can be as simple as providing a username and password to confirm your account or it can be much more complicated like implementing Single Sign On (SSO) where a user verifies a 3rd party account like Facebook, Google, or Discord. Regardless the method the user verifies a user account exists and that’s it.
Authorization (authz) is the process of verifying that a user has permission to perform an action. While the user could be unauthenticated, the more interesting use case is determining the access of a specific user. Authorization determines if a user can access a service or perform an action. Without Authorization all users once authenticated would have the same level of access and permissions.
If you have more than one user and you would like to allow them to access different services you really want both Authn and Authz. Authn can be addressed several ways it’s the Authz portion that it turns out is a lot harder to find without paying for enterprise features. Having Authz available separate from the end application is important for a lot of home lab software which doesn’t implement Authz itself or doesn’t integrate with external auth providers. Having this done in a common centralized way means you can require Auth for any service you like regardless of that services authorization implementation.
Looking for Authz support in Ingress
To narrow the field of options I’ve specifically reviewed ingress controllers for Auth capabilities. A good community maintained comparison can be found mainted in google drive here. This comparison can help narrow the field for a deeper review of controllers that meet your needs.
The process I used was to start by reviewing the Authentication and Authorization rows under section 3 of the features list. Next I reviewed the Authentication methods that are supported under section 7 of the feature list. Finally I compared the other available features, protocol support, and how many features were behind a paywall.
Finally, I reviewed some documentation on Authorization. I find this feature set to be often overstated. For example the entry for Traefik states “The ForwardAuth feature of Traefik can act as authorisation if the service behind it can use a system like OpenPolicyAgent”. The rest of the Authorization features are part of the enterprise only software. Personally, I find this disingenuous, claiming Authorization support because the Authentication includes profile information that downstream can use to perform it’s own Authorization isn’t actually doing the Authorization. Please note this is a community maintained list, I wouldn’t attribute this claim to the Traefik team directly without more investigation.
My top choices
From this review I found Istio and Apisix to be both be interesting choices. One of the primary factors for that is that both projects have a broad set of features and they develop their features completely in the open. Projects like Traefik, Kong, and Nginx+ were interesting options but have an unfortunately large amount of Auth features as paid only. In particular OpenID is frequently not available.
Istio
I’ve used Istio for some time and I’ve found the Auth features to be fairly good. There were two primary issues I had with Istio. First, UDP routing isn’t provided this makes some services like DNS (pihole, acmedns, etc) unable to operate behind the Ingress. Secondly, correctly configuring Istio is famously difficult. You can see an example of this on the Security concepts page of their documentation. While I was able to check fields on the claims after Authentication it always seemed like I was putting to much logic in Istio and to little in Keycloak. This is largely due to the fact that Istio Authorization is directly checking claims on the users token not using Resources, Scopes, and Permissions built into Keycloak. Maybe it can be configured that way, but I didn’t find any documentation to that effect.
Apisix
More recently I’ve switched to using Apisix and I’ve been really impressed with the features it has. It supports most protocols, including UDP, a good range of Authentication and Authorization plugins, and the authz-keycloak plugin works well and allows keycloak to handle the authorization decision process. The complexity is much lower than configuring Istio, and small quality of life things were better as well. For example you can define a tls certificate to be used from another namespace, something Istio doesn’t allow, which is nice for testing Apisix in parallel with Istio and being able to gradually transition services.
Apisix with Keycloak
Apisix uses the custom resource ApisixRoute to configure routing to backend services. Part of the spec includes the ability to extend the routing with plugins. There is already an extensive list of available plugins.
Here is an example of a Route I’m using to restrict access to gitea with Authn and Authz.
apiVersion: apisix.apache.org/v2beta3
kind: ApisixRoute
...
spec:
  http:
  - backends:
    - serviceName: gitea-http
      servicePort: 3000
    match:
      hosts:
      - gitea.zarek.cc
      paths:
      - /*
    name: gitea-http
    plugins:
    - name: redirect
      config:
        http_to_https: true
      enable: true
    - name: openid-connect
      config:
        access_token_in_authorization_header: true
        bearer_only: false
        client_id: apisix
        client_secret: REDACTED
        discovery: https://authx.zarek.cc/realms/home/.well-known/openid-configuration
        introspection_endpoint_auth_method: client_secret_post
        realm: home
        redirect_uri: https://gitea.zarek.cc/oauth
        scope: openid profile
        set_access_token_header: true
      enable: true
    - name: authz-keycloak
      config:
        client_id: apisix
        client_secret: REDACTED
        discovery: https://authx.zarek.cc/realms/home/.well-known/openid-configuration
        permissions:
        - Gitea
        ssl_verify: false
      enable: true
    websocket: true
The backends section is fairly easy to understand without explanation. The plugins are a little more interesting. The first plugin is the redirect plugin and it just redirects traffic to ensure https is used.
The next plugin is the openid-connect plugin which is using keycloak as an identify provider. The client_id, client_secret, and realm values come directly from the keycloak instance and it’s configuration. The discovery url is a known path on the URL keycloak is hosted at. Finally the redirect_uri needs to be included in the path for the route and shouldn’t be used by the service because the plugin will capture this path. This enables authentication and only users that complete authentication will be able to proceed.
The final plugin authz-keycloak is what adds the call to keycloak for authorization. The client_id, client_secret, and discovery sections are the same as before. The additional field permissions is a list of resources to request permission to. This is what checks if the already authenticated user is authorized for the current action. In this example I’m only verifying access to the “Gitea” resource although you can also check for a scope for more fine grained access. Scopes check the action you are performing on the resources.
With these two plugins and minimal configuration both Authn and Authz are implemented with the user accounts and Authorization rules all handled by keycloak. I’ll briefly show what a resource looks like in keycloak.
Keycloak client with authorization
When adding a new client in Keycloak, on the settings tab the Access Type must be set to confidential and Authorization Enabled needs to be switched on as shown below.
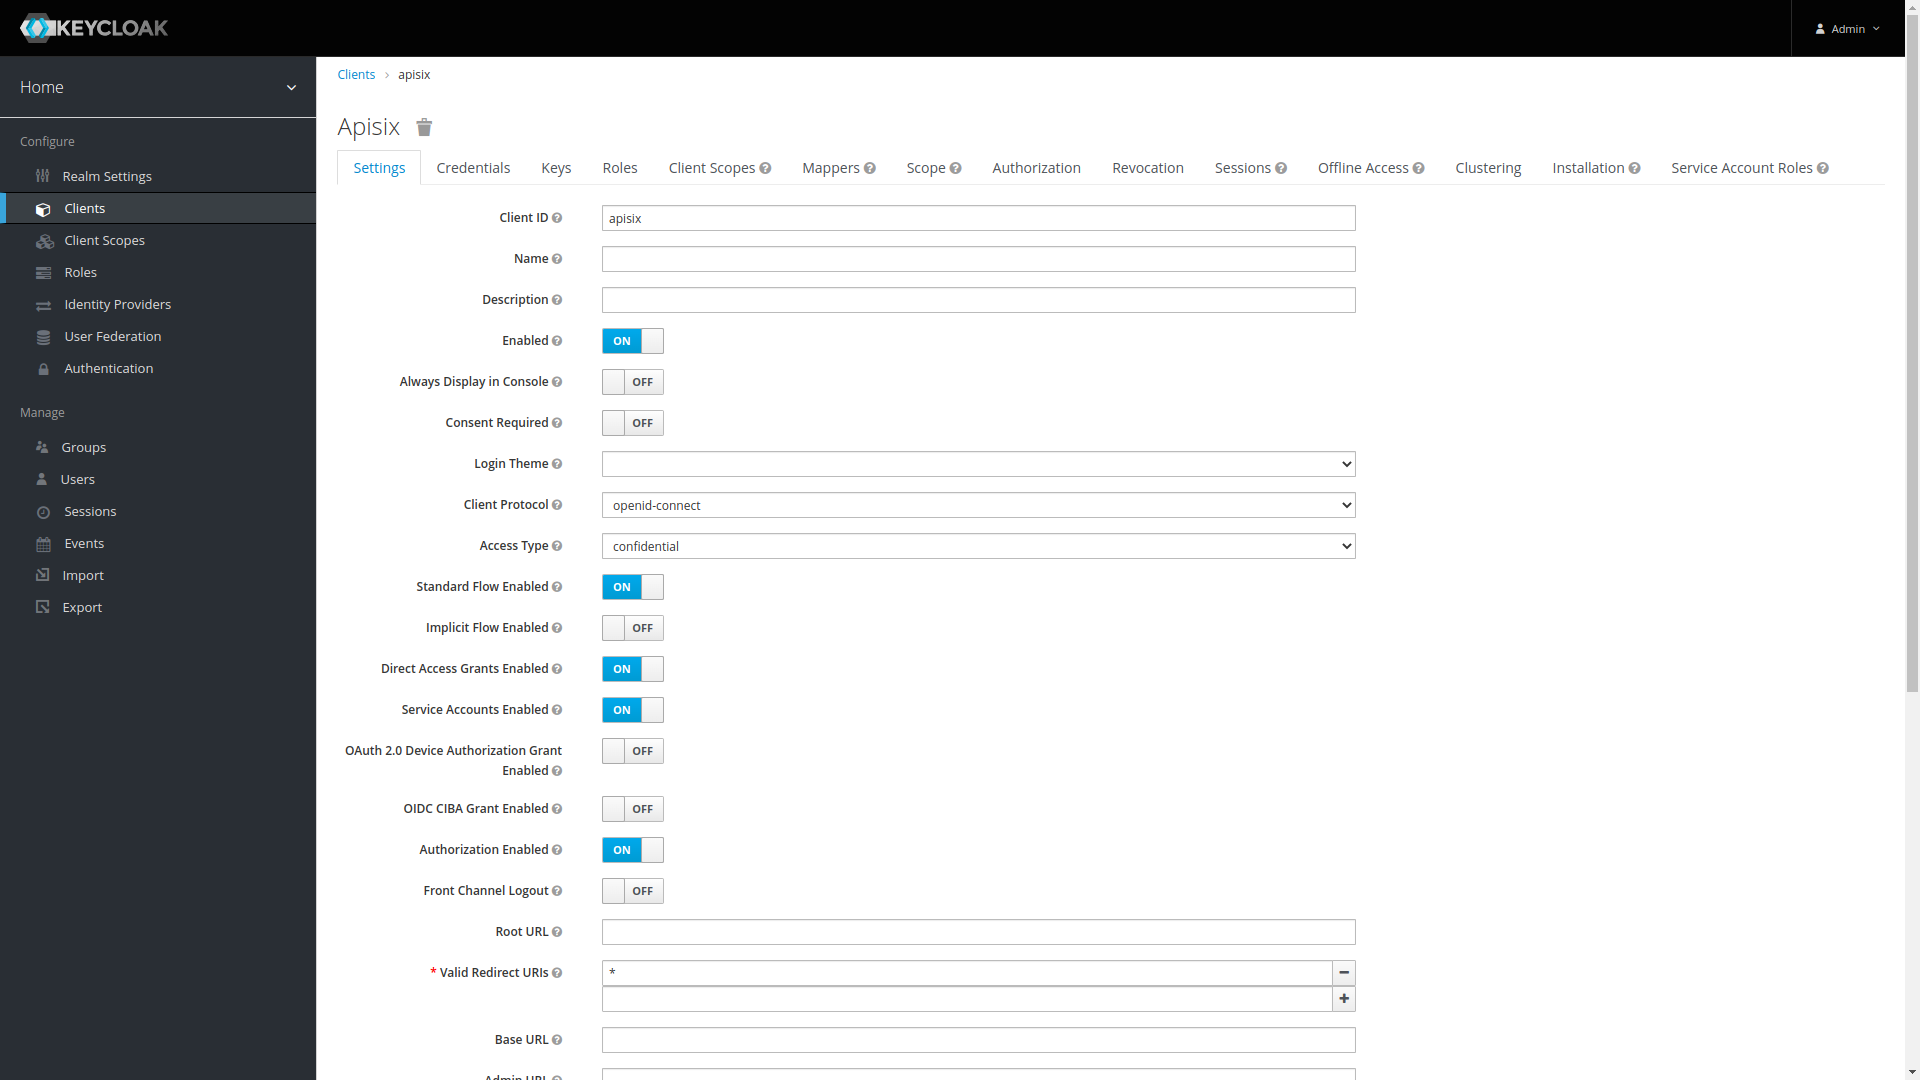
This enables Authorization for this client which can be configured on the new Authorization tab that appears. Under this tab the secondary tab Resources is where you define the resources that the authz-keycloak plugin is referencing. The image below shows the Gitea resource which the above config is authorizing against.
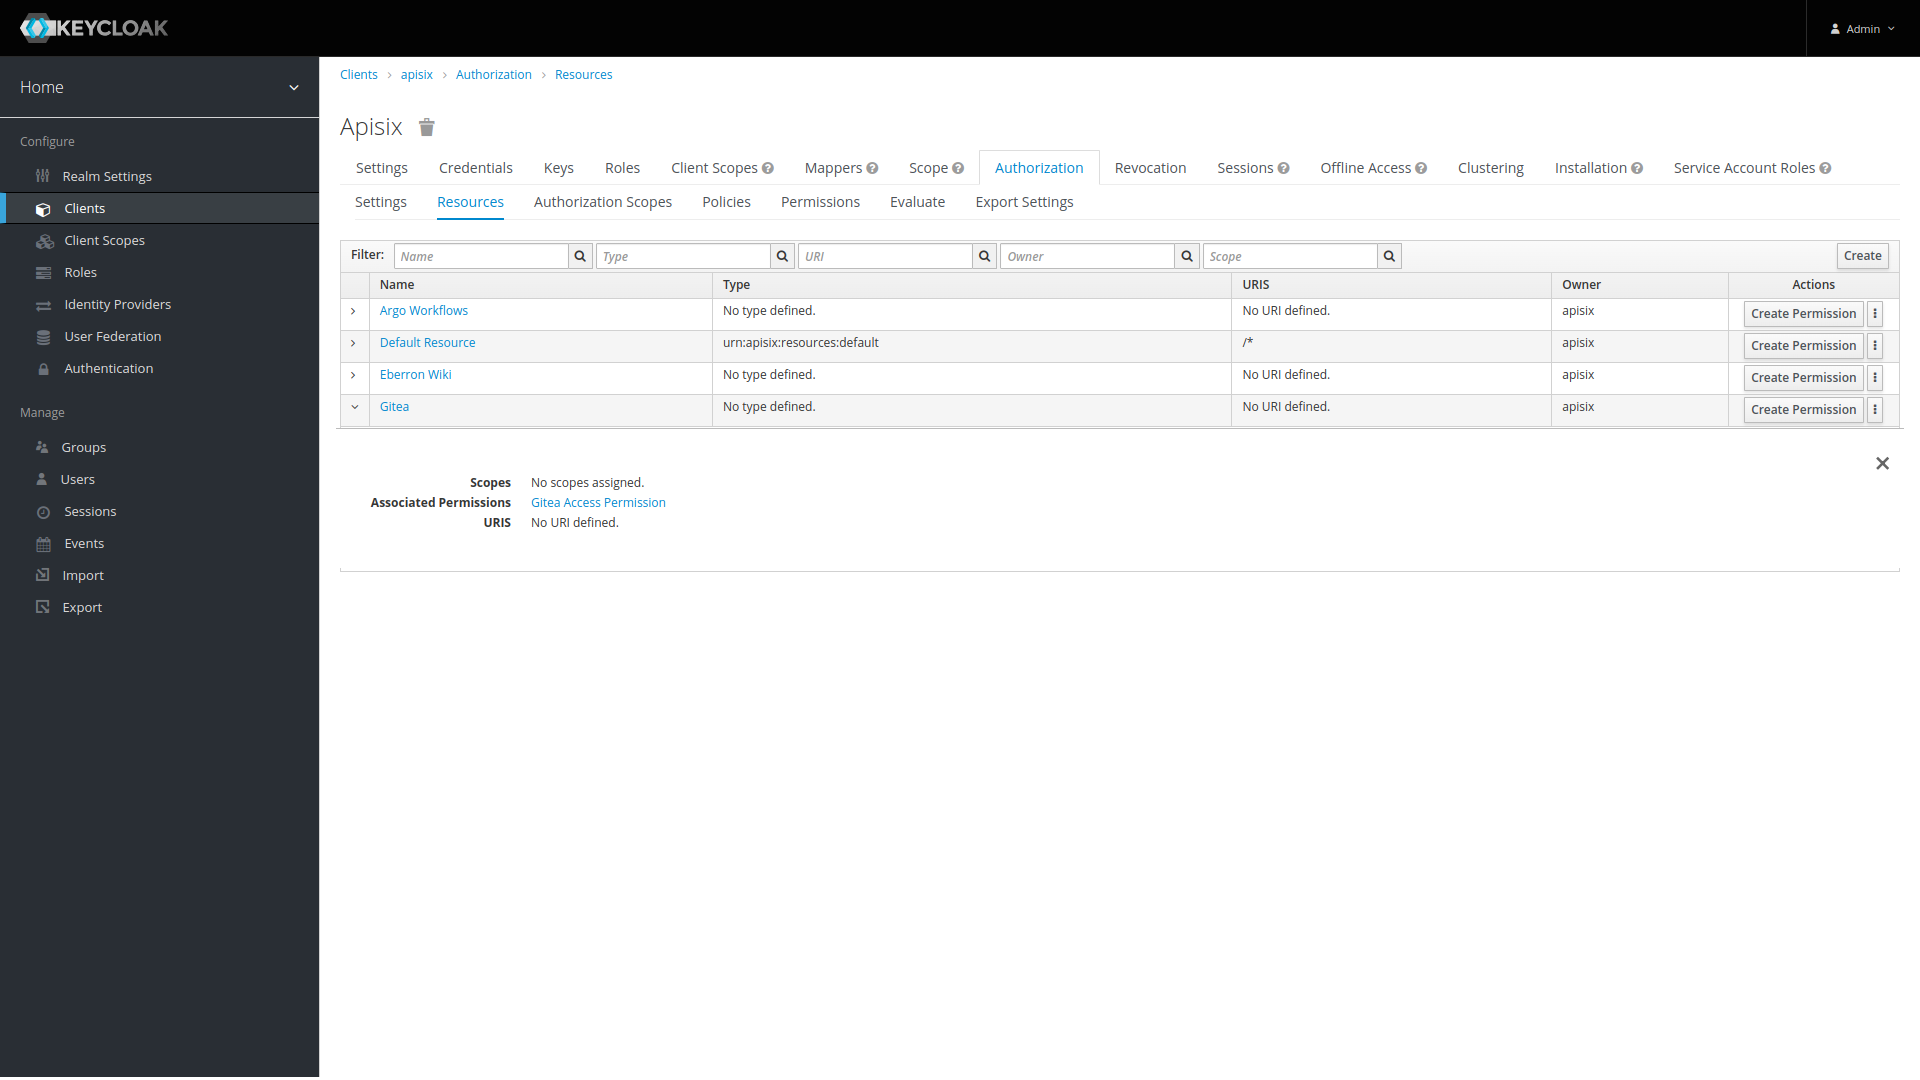
This resource has a Permission and Policy defined under the tabs by the same names. The Permission is configured to allow access based on membership in a group. Users must be in the group to be allowed access. The Policy simply attaches the Permission to the Resource so that the Gitea resource checks the Policy which requires group membership. To read more on managing resources in Keycloak see the Keycloak documentation
Summary
For a homelab or small business environment that wants to have centralized user management and authorization the combination of Apisix and Keycloak is a flexible open source solution that isn’t terribly high in complexity. Apisix offers a large number of plugins to cover most use cases, handles most protocols including TCP and UDP routing, and doesn’t limit features behind enterprise licensing. Keycloak integrates nicely with Apisix provides centralized user management and can integrate with other identity providers including user extensions like keycloak-discord.
Authorization is a complex topic, no single solution is best for all situations. I have been really impressed with Apisix and it’s not an Ingress Controller I had heard about outside of the above comparison chart. If your use case is similar maybe it’s a good choice for you too.