With the world dealing with COVID-19 by social distancing many gaming groups are left looking for ways to game while keeping their distance. This post will provide an overview for installing Foundry Virtual Tabletop, a software specifically designed to support playing table top games remotely with a group. I found this overview helpful in comparing Virtual Table Top options. One unique feature of Foundry is it uses a self hosted one time purchase model. In this post I’ll be using the same tools I’ve used in previous posts to deploy local or to the cloud provider of your choice.
Setup
Since this post is targeted at people interested in Foundry I won’t make the assumption you are familiar with Juju, Charms, or LXD. If you are you can move onto the installation steps below. For this setup I’m going to start from a clean Ubuntu Bionic (18.04) machine, if you want to follow along.
While these tools have a lot of additional configuration options I will only go over what’s necessary to get started. You can dig into more advanced networks and configuration options when/if needed at a later time.
The tools
For this guide we’ll install the software into LXD containers locally. This will let us test out Foundry and the automation tools and remove the containers when we’re done. The deployment will utilize Juju to manage the software and can be used to deploy on different environments. While we’re going to deploy locally on LXD the same tools and process can be used to deploy to a variety of cloud providers.
Setup the local environment
We’ll need LXD and Juju both of which can be installed as snaps.
# Instal snaps
sudo snap install lxd
sudo snap install juju --classic
# Setup lxd with defaults
lxd init --auto
# Verify LXD
lxc launch ubuntu:18.04
lxc list
This should install the dependencies and launch a test container. The final command lxc list
should provide a table showing your new container.
+----------------+---------+------------------------+------+------------+-----------+
|      NAME      |  STATE  |        IPV4            | IPV6 |    TYPE    | SNAPSHOTS |
+----------------+---------+------------------------+------+------------+-----------+
| capital-martin | RUNNING | 10.177.243.208 (eth0)  |      | PERSISTENT | 0         |
+----------------+---------+------------------------+------+------------+-----------+
We don’t need that container it was just a test, remove it with lxc delete --force
capital-martin, use the name that was generated for your container.
With LXD setup we’ll establish a local Juju environment, the processes of setting up a provider is known as bootstrapping.
juju bootstrap localhost lxd-controller
You can now check check the status of your juju environment with:
$ juju status
Model    Controller  Cloud/Region         Version  SLA          Timestamp
default  local-lxd   localhost/localhost  2.7.5    unsupported  18:38:05-05:00

Model "admin/default" is empty.
You’re all set, if you have any issues more detailed instructions are available on the juju lxd documentation.
Deploying
Let’s start by deploying a bundle which will get the install running and then review the
details of what it is doing. A bundle is simply a yaml file that completely defines a set of
applications and options in a single file. Create a file named bundle.yaml with the
following contents in it.
series: bionic
applications:
    foundry:
        charm: cs:~pirate-charmers/foundryvtt
        num_units: 1
        options:
            proxy_port: 80
        resources:
            foundryvtt: ./foundryvtt-0.5.5.zip
    haproxy:
        charm: cs:~pirate-charmers/haproxy
        num_units: 1
relations:
- - haproxy:reverseproxy
  - foundry:reverseproxy
Foundry currently distributes the software via foundryvtt.com and requires a one time purchase. At the time of this writing it can be purchased as pre-release, with the full launch planned for 2020-05-22. You will need the Zip file for Linux be sure the file is in the same directory as the bundle.yaml and that the name of the file matches the filename shown above. If you have a newer version simply update the name for the .zip file in the bundle.yaml to match your file.
With the bundle.yaml and foundry.zip you can start the deploy:
juju deploy ./bundle.yaml
You can see the status of the install with juju status --color. I prefer to watch it for a
continual update watch -c juju status --color --relations.
When the deploy is finished you’ll see a status that looks like:
Model    Controller  Cloud/Region         Version  SLA          Timestamp
default  local-lxd   localhost/localhost  2.7.5    unsupported  19:36:38-05:00

App      Version  Status  Scale  Charm       Store       Rev  OS      Notes
foundry           active      1  foundryvtt  jujucharms    4  ubuntu
haproxy  0.1.8    active      1  haproxy     jujucharms    8  ubuntu

Unit        Workload  Agent  Machine  Public address  Ports   Message
foundry/0*  active    idle   0        10.177.243.14           Unit is ready
haproxy/0*  active    idle   1        10.177.243.63   80/tcp

Machine  State    DNS            Inst id        Series  AZ  Message
0        started  10.177.243.14  juju-53a674-0  bionic      Running
1        started  10.177.243.63  juju-53a674-1  bionic      Running

Relation provider     Requirer              Interface     Type     Message
haproxy:reverseproxy  foundry:reverseproxy  reverseproxy  regular
What was deployed
This bundle deploys two pieces of software.
- FoundryVTT - The virtual table top server
- Haproxy - Provides reverseproxy for FoundryVTT
This closely mirrors the configuration as described for setting up an Ubuntu VM on the community Wiki. Where the instructions on the Wiki use NGINX I’m using HAProxy both serve as a reverse proxy for Foundry.
Each software that Juju deploys is controlled via a piece of software known as a Charm. The HAProxy and FoundryVTT charms are publicly available and manage the installation and operation of each of those pieces of software. In this case they handle the setup much like the Wiki. Foundry installs Node, the provided Zip file, sets up a daemon to keep it running, and registers with HAProxy.
HAProxy has been installed and sets up the reverseproxy that is requested by Foundry.
This is done via a relation which is shown at the bottom of the bundle. The relation is a
known connection point between charms, in this case it’s named reverseproxy and we’ve
connected Foundry to HAProxy as they both support the relation type.
In the juju status output you’ll see a table with a section for App, Unit,
Machine, and Relation. Apps are the charms that are in the environment and tells you
where it was installed from (jujucharms) and the Revision. Units are an actual instance of the
application. In this case ‘foundry/0’ and ‘haproxy/0’. The Units tell you the IP address they
currently have, what machine they are on, and some status about the unit. Machines are a list
of all machines in an environment where machines can be bare metal, containers, virtual
machines, etc. Machines aren’t terribly interesting here, but on a cloud provider you might
install multiple units on a single virtual machine. Finally, a table of relations tells you
which relations currently exist, there is one as discussed above between haproxy and foundry.
Accessing Foundry
With the deployment settled and all units showing active/idle we can access foundry. From the
status above we’ll use the IP Address for HAProxy and the subdomain ‘foundry’ which is the
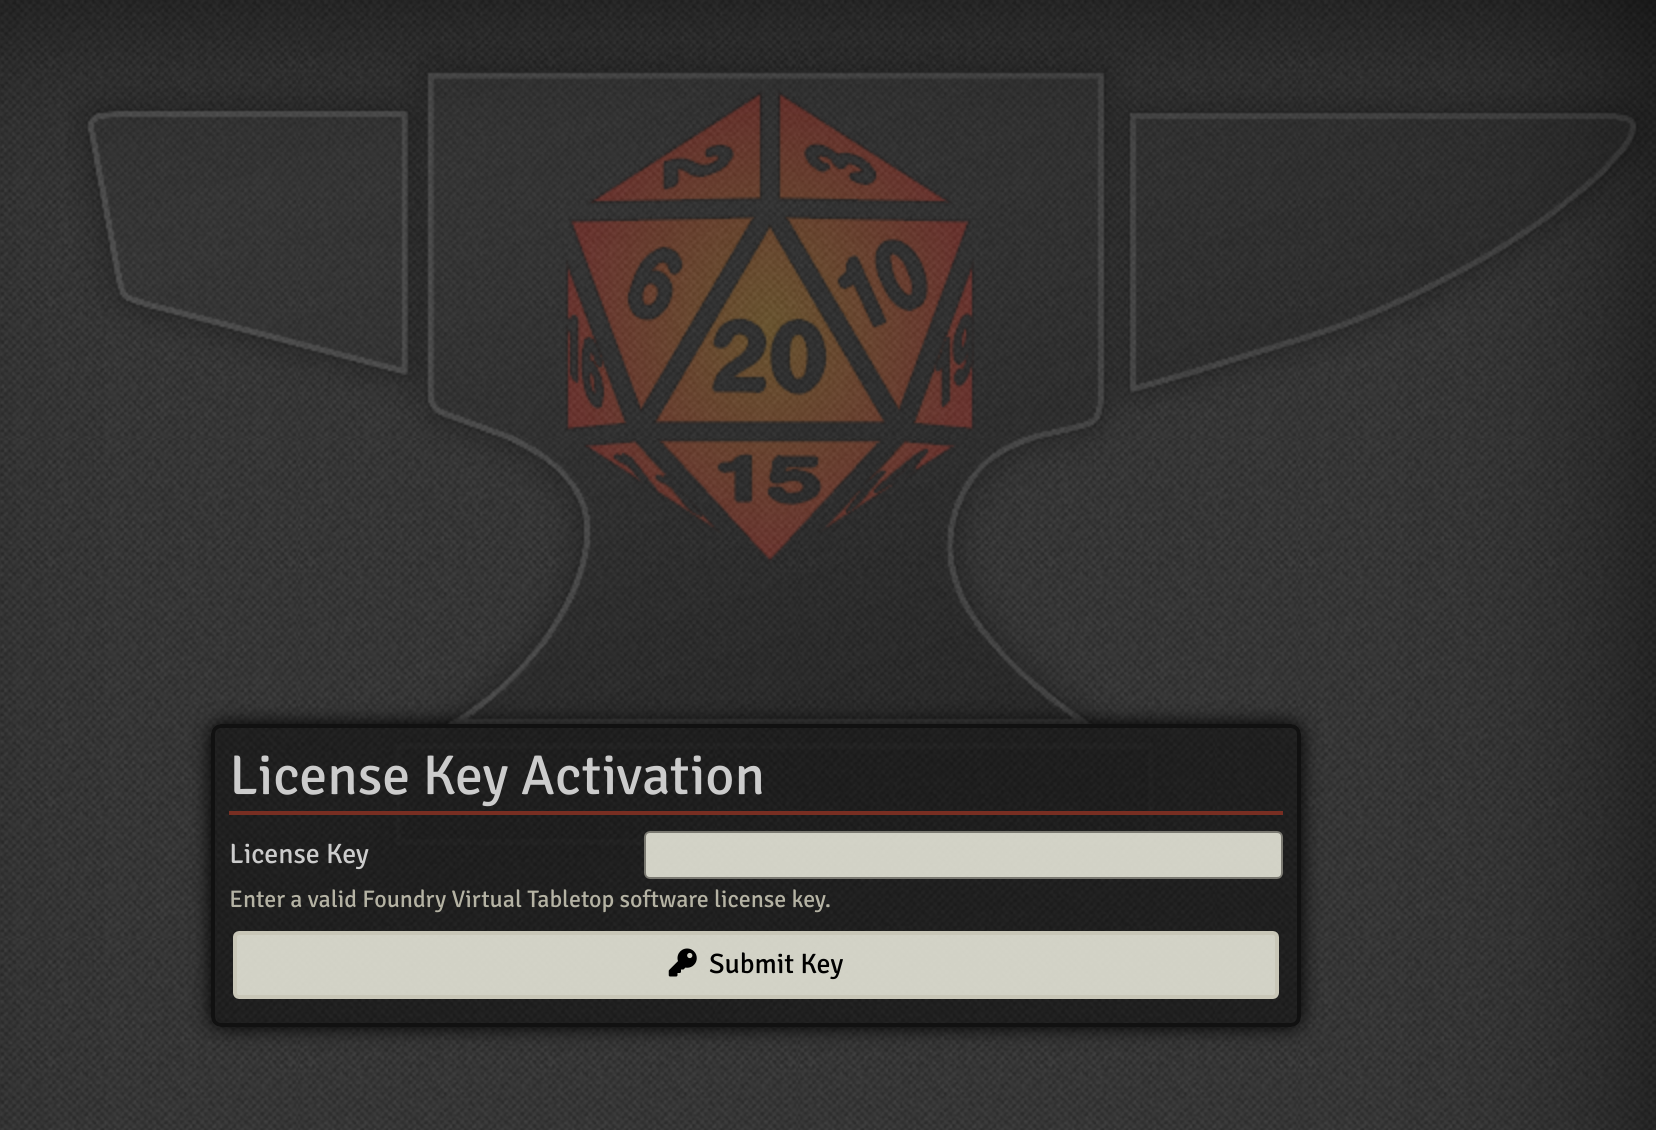
default set on the foundry charm. Open a browser to http://foundry.10.177.243.63.xip.io and
you should be greeted with the Activation Screen.
The use of xip.io is a convenience domain that lets us use an IP address like a domain name.
You can log into HAProxy or Foundry if you like with the juju ssh command. Also of interest
is juju scp which lets you copy files to/from machines. For example you might want to
copy a file to foundry to use as the background image for a world. You can do that with juju
scp ./my-awesome-background.png foundry/0 or access foundry to see logs juju ssh foundry/0.
If you do put files on Foundry you’ll find the data path the charm uses is /opt/foundry/userdata.
As I continue to update the Foundry charm additional actions for operating the software may
become available. Charms can be upgraded with juju upgrade-charm command allowing you to
pull in any fixes or changes. If you find bugs or features that should be part of the charm
you can file them on the github page for the charm. Additionally, I idle on
the Foundry Discord server with the user name Zarek if you want to ping me on the
#installation-support channel.
Cleaning up
When you’re done and want to remove the containers you can remove the model with all the
applications and machines and reset to a new clean default model with the command
juju destroy-model -y default && juju add-model default
From here you can redeploy with the same or new configurations if you like.
Production use
With Juju you can target several cloud providers to deploy your software onto. With the same charms shown here you can deploy to whichever provider you prefer. For self hosing in a lab environment the LXD or MAAS providers allow you to deploy to either containers or bare metal machines of your choosing. I’ve run labs hosted on a single machine as LXD containers as well as a multi-machine lab deployed with MAAS.
By default if the option proxy_port is not set it will use 443 to provide a secure
connection. The details of setting up HAProxy with Letsencrypt are beyond the scope of this
post but it is supported by the charm and an example of setting it up can be seen in the
previous blog post about bundle weechat. In that post, HAProxy was also
used, and the section Accessing weechat via relay walks through the use of ddclient and
HAProxy to setup a domain and Letsencrypt. As mentioned before feel free to ask questions
via Discord if you are ready to plan a roll out to a cloud provider or hardware in your lab.
Additionally, the weechat post demonstrates installing multiple charms on a single host with HAProxy
being deployed directly to the machine and other software in a LXD Container on the machine.
This same setup will let you run FoundryVTT and HAProxy on a single cloud machine.
In my experience if you deploy to a cloud provider the instance size needed to run the software is not very high. However, I’ve seen instances that die during installation due to lack of resource on small instances trying to install packages. One way to deal with that is to install with a default machine size and after it’s up and running shut the instance down and resize to a smaller instance.